Welcome!

Shadow Box Frame made with Uniquely Creative July 2018 Kit (Gypsy Rose) Thank you for sneaking a peek into my creative world.  My na...

Friday 23 November 2018

Taking the plunge... into a handmade start-up business

How I started my handmade papercraft and jewellery making business


For as long as I can remember I wanted to own my own business, as I am in property I always thought that I would do something related to that but due to the uncertainty of the market and my slight career deviation into place making instead of property management I decided to expand on my passion for papercraft and jewellery making. 


It took me a considerable amount of time to pluck up the courage to actually do it and due to my long hiatus of 15 years while raising my son I had become somewhat rusty on the techniques to do with papercraft in particular so I quickly realized that I needed to get way more involved in learning the current trends, techniques and popular companies involved in the craft.

My mother in law has been a great help with this process as she has been papercrafting for over 8 years and it is part of her job as a disability worker to teach the clients how to embellish cards and other craft activities. She is a craft shopping addict and knew most of the popular techniques and faces so I quickly got up to speed with everything.


She took me along to my first scrapbooking retreat and craft show which I thoroughly enjoyed. This is us at that camp...


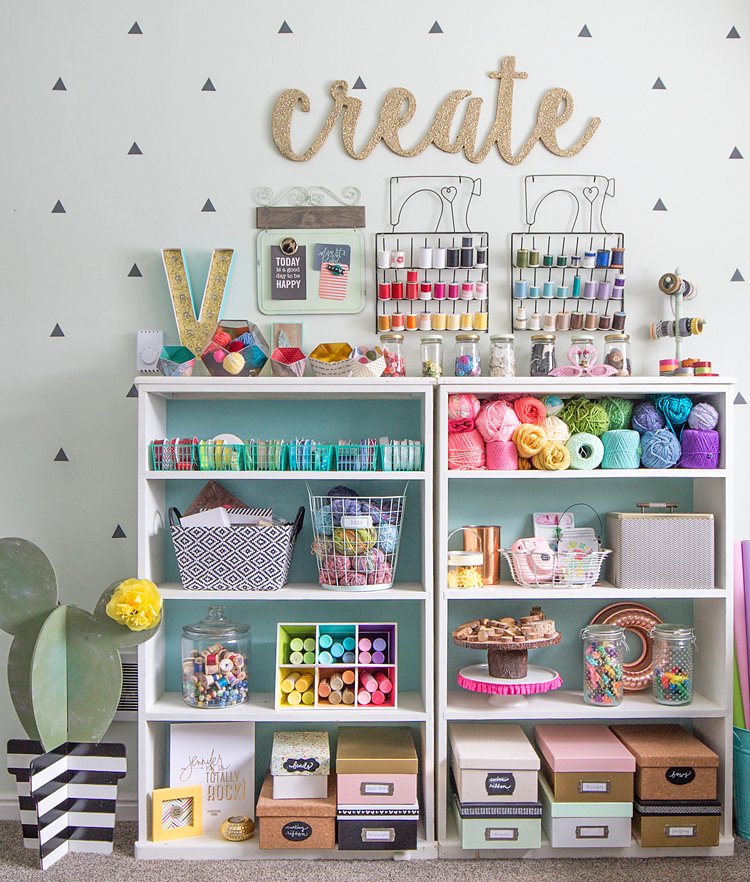
As I am a self confessed shop-a-holic it wasn't too long before I had converted our 'spare room' into a crafters heaven with every crevice crammed to the brim with all kinds of embellishments, foils, dies, stamps and any other blingy shiny thing I could get my hands on, this quickly morphed into me wheeling and dealing on Facebook acquiring good quality second hand bulk lots and converting them into smaller, more detailed appealing lots which turned a small profit most of them time.

This was not enough to feed my shopping addiction and I soon bought up everything worth purchasing on Facebook marketplace so I decided to create a proper business, I registered for an ABN and registered my business name. I came up with my business name, Uniquity Designs because I always have to customize everything with my name and rarely settle for what everyone else is interested in. I searched the net to confirm whether that name had been used and lucky for me it hadn't.


I created a Facebook page @uniquitycrafts and 2 groups 'creative papercrafts australia' and 'jewellery making australia' both related to my interests, then I soon realized that there was no group for craft storage so I created 'craft storage inspiration Australia'.

I am now growing the business by getting wholesale accounts with various craft suppliers locally and internationally to stock my online store and I plan to become design team member for a couple of big name suppliers and a teacher at my local scrapbook store, to do this I am focusing on my brand and building my social media following by posting my creations on Instagram and writing these blog posts.

The NSW government has programs to assist developing start up businesses which include a free consultancy service, which you can access here: https://www.industry.nsw.gov.au/business-and-industry-in-nsw. I have found the consultant very helpful in providing tips on where to focus your marketing efforts.

The most difficult thing I have experienced so far is my impatience, wanting everything to happen in an instant. From my chats with various well established craft supply business owners it has taken them quite a few years to build up their brand and many of them are not working full time which gives them the additional time to build the business up.

I have booked in my first local market stall which is linked to a Christmas event at the shopping centre so I am preparing for that. Need to make so many more items to stock my store. Need to order tables, banner signs, tablecloths, gather all of the display props and get a gazebo.


I have also booked in to sell goods at Vicki Pye's craft retreat at Narrabeen next year, I was so lucky that I was allowed to as most organisers have their own shop so they don't usually let you set one up at their retreat, I am very grateful for this opportunity.

I highly recommend doing your research and building your network before diving into to craft business world. Also price up how much your stock and cost to make the items will be. Otherwise you might get caught out with a huge hole in your savings as it takes a while to get your name out there and you need to buy bulk to make savings.

Hope this post was helpful and informative for all of you that are considering starting your own craft business.

If anyone has any other tips for start up craft businesses, please feel free to comment on this post.


Happy crafting

Mel xo


Male 18th birthday greeting card tutorial


Dear papercrafters,

This has been such a busy year, so many milestones for our family including my son's graduation from high school and his 18th birthday.

I have been planning this card for quite a while, collecting various materials to use including many different cogs and gears themed embellishments.

Here are some close-ups of the finished product: 


First, I cut a piece of ordinary black cardstock to fit the white card base that I had chosen.

Then I embossed the cardstock with this embossing folder from Sizzix Tim Holtz.


After I embossed the card stock I used copper colour Nuvo Embellishment Mousse to bring out the details in the embossed design. I put a little on my index finger and then rubbed it over the cardstock in a random fashion.


Then I stuck the cardstock onto the card front with my ATG gun leaving a small gap at the top of the card base for the 'Happy Birthday' greeting stamp.

I used the Averyelle 'Happy Birthday' greeting from the banner bits clear stamp set with Momento Tuxedo Black ink.


Then I rubbed the copper embellishment mousse onto the ScrapFX Cog Key 18 chipboard cut out and stuck it on top of 3 black cardstock cogs die cuts. 


Lastly, I cut out the letter E V A N out of thick white card stock and stuck them onto the embossed cogs design.

I finished the card off by rubbing a little bit of embellishment mousse onto the top of the card over the 'Happy birthday' greeting.


Have a wonderful day!

Mel xo


Saturday 10 November 2018

Beginners Guide to the Go Press and Foil machine by Couture Creations

Foiling chipboard for beginners

Hi Everyone, I am Melissa and welcome to my post today.

I have recently purchased the Go Press and Foil machine from Couture Creations and I am so obsessed with it that I had to share what I have created with you.

This is the first in a series of blog posts on the various capabilities of the Go Press and Foil machine. Today I explore foiling chipboard pieces...

I have used various chipboard pieces and foils by Couture Creations Christmas collection but this technique works with any chipboard cut outs or pieces you already have and any foil as well.

Snowflake border chipboard cut out pieces from Couture Creations


First plug in your Go Press and Foil machine and place your metal adaption plate onto the heating pad.


Place your foil shiny side down and then place your chipboard pieces on top of it.


You will need a piece of thick cardstock as a shim, depending on your die cutting machine you might need to add additional cardstock pieces to make the sandwich tighter if you are not getting the desired results.

TIP: you can use any die cutting machine, I have used my Sizzix Bigshot


Run your sandwich through your die cutting machine.


Remove your sandwich from your die cutting machine and carefully take the chipboard piece out of the sandwich, then gently peel the foil off of the chipboard pieces. 

Et Voila! And there you have it, beautifully foiled chipboard pieces ready for placing on a card or scrapbook page.

This technique is so simple and quick but yet so effective. 

Products list: Go Press and Foil machine by Couture Creations
                    Sizzix Bigshot
                                  Snowflake border chipboard cut out pieces by Couture Creations
                    Holographic stripe foil by Ultimate Crafts
                    1 x piece of cardstock for shim
                                  Metal adaptor plate

Thank you for visiting today and I hope you were inspired to foil some chipboard pieces.

Head into my shop to purchase the Go Press and Foil machine for only $120.


Have a wonderful day!

Mel xo

Friday 9 November 2018

Craft Room Tour


Come take a tour of my creative happy place!

Hi, my name is Melissa and I’m a craft collector addict. I love papercrafting, jewellery making, DIY home decor and I love to buy hoard craft supplies even more. My craft room is my happy place and it’s packed full of colorful, creative storage ideas and inspiration.

Lately I’ve been having a really hard time keeping my craft room clean, which tells me that I’m in need of a serious de-stash and some new storage solutions.

This room serves as my craft room, stockroom for my craft supply home business (which, as a crafter, you know means I have a a lot to store), and somewhere for hubby to hang his clothes as I have completely taken over the wardrobe in our room, hehe. 
I’ll do some follow up tutorial posts on some of the craft projects within the room (including a full list of sources). But today is just an overview of the room in a holistic sense.

Kmart clear fridge storage holds my alcohol inks, for easy reference I have stuck some small white dot stickers on the top that I have coloured with the corresponding ink.


I got these cake stands for my Bridal Tea and decided they would be great for storing my paints and embellishment mousses, I have sat them on Kmart lazy susans so now they spin around helping me to access the stuff stored at the back.


Jewellery rack from eBay stores my Ultimate Crafts foils.


Shelf from Kmart for my beautiful Martha Stewart punches


Pantry shelf from Kmart and Fridge storage also from Kmart, not sure what I will put in this, probably more stamps or dies.


Gold magazine rack from Kmart, storage boxes I got from Woolworths for half price, they come with this really handy inner tray with compartments, I use these to store my vast collection of charms.


Trinket drawers from Kmart, custom painted by my hubby the amazing vehicle spray painter. We masked and painted each section individually to get that beautiful effect


My desk is originally from Eckersleys and is glass tops with lots of storage on either side, all of the railings are magnetic and there is a thin drawer under the desktop which is where I store my stamping platform and other stamping accessories, so handy.


IKEA Kallax cube unit, Kaisercraft paper storage shelves, the baskets on the bottom of the shelves are from Bunnings, I like the colours better than the IKEA ones and they are a lot cheaper too.


This hall table I got with my townhouse when I bought it 6 years ago, I have so many storage items on it that I no longer have any room, hehe.

Above is the foam custom order sign I got for the flowerwall for the photobooth at my wedding in 2017 from local business, Styroboss Creations, you can choose colours, fonts, sizes and they are super friendly.


Makeup storage from Kmart holds my glitter tubes and packets.


I use a Variera large pantry shelf form IKEA to store my Sizzix Bigshot on, I keep all the accessories underneath in a gold intray from Kmart.


This is how I store some of my clear stamps, I got the idea from Jennifer McGuire, she does some amazing things on her YouTube channel and she is super organized which I really appreciate.


Sandwich containers from Woolworths for my embossing powders


Gold rimmed jewellery box from Kmart


Cookie jar from Red Dollar for my button collection


2 sets of stackable storage contianers from Kmart and on either side some compact makeup storage holds my small ribbon spools


Kaisercraft 'Choose happiness' MDF sign, painted by my hubby, a gift from my mother in law Lyn and was on our bridal table at our wedding.

Bunting banner from Hot Dollar, I bought 2 packets and mixed and matched them


I sell these white dots in my shop, $2 per sheet. Bargain!


Kmart lamp painted by my hubby


Under shelf storage for my packet flowers

If you have any questions on any of the items in the pictures or how I did anything, please contact me. I am happy to help.

Thanks for reading my crafty friends

Hope you like my craft room tour!

Mel xo